Tech Help - General Problems for Mongoose II Reincarnation
All numbers in parenthesis correspond to the latest Schematic found on our site:
Mongoose II Reincarnation
Be sure to also reference our
manuals section
If you need the reader plug-in
click here for installers.
To purchase any parts, please contact:
1.800.220.3222
Problems:
Does Not Fire
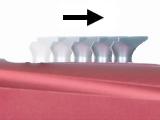
Marker is not cocked
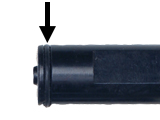
Re-cock the marker by pulling the Connecting Pin (#28A in Schematic) to the rear of the marker until it "Clicks" into place. This allows the Cup Seal (#7) to seat forward and seal the valve.
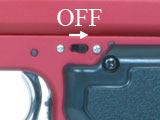
Marker is not on
Make sure your marker is on the ON Position as described in your manual.
Battery
Ensure your 9v battery is fresh and connected to the 9v harness correctly, and snapped completely in place. Make sure the battery being used is a strong name brand battery. We recommend the use of any standard Duracell or Energizer battery for best results.
Out of Gas
Your propellant source (CO2 or compressed air) may be low on gas causing the gun to not fire. Refill or replace your propellant source and try again.
Marker not turning on
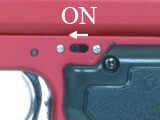
Ensure your marker is on
Make sure your marker is on the ON Position as described in your manual (see above).
Battery
Ensure your 9v battery is fresh and connected to the 9v harness correctly, and snapped completely in place. Make sure the battery being used is a strong name brand battery. We recommend the use of any standard Duracell or Energizer battery for best results.
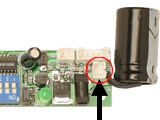
Battery Lead
Check the connector for the battery harness and make sure it is plugged completely into the Circuit board.
Does not re-cock after firing
Low on propellant source
Check to make sure you are not low on your propellant source (CO2 or compressed air). Refill your propellant source.
Hammer O-Ring not creating seal
The Hammer (#1) o-ring may not be creating enough of a seal to blow back into the re-cocked state. Check this o-ring and if it is damaged or broken, replace.
Debris in breach / Lack of lubricant
Disassemble your marker and perform normal maintenance on cleaning and lubricating.
Low Velocity
No Velocity Adjuster or Needs Adjustment
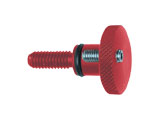
Check to make sure your Velocity Adjuster (#12) is properly installed at least two complete turns into the Hammer Plug (#24). Turn clockwise to increase velocity, counterclockwise to decrease.
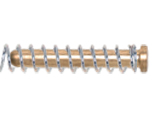
Missing Spring Strut
The spring strut is used directly with the velocity adjuster to compress the main spring. This is what creates an increase in velocity. If the spring strut is missing, or placed incorrectly the velocity adjuster will not be making any contact and it is the equivalent of having no velocity adjuster installed.
Incorrect Valve/Main Spring Installed
If you have modified your marker's valve or main spring in any way or replaced them and you now have a velocity problem, change both springs back to the stock springs.
If you have not modified the springs in any way or replaced either of them, your marker may require different springs to achieve the level of velocity you desire. The stock springs in the marker are designed to allow an acceptable level of velocity while prohibiting unsafe velocity spikes that are common to use with CO2.
Most spring kits offer 3 valve springs and 3 main springs. The 3 springs for each type represent 1 spring at a lower tension, 1 spring at a higher tension, and 1 spring at the same tension as stock. When attempting to increase your marker's velocity, start by changing the front valve spring to the lightest tension spring, the one that is most easily compressed between your thumb and forefinger. This should equate to about a 20-40 feet per second increase in velocity, depending on what the tension of the stock spring was. If after chronographing your marker with this new valve spring installed you find you need to further increase the velocity, change the main spring to the one with the most tension. Be sure that your marker does not fire over 280 feet per second.
Multiple Shots Per Trigger Pull
Gun fires multiple times from pulling the trigger once
Your Sear or Hammer may be worn. This would cause the sear to sometimes not catch the hammer during recoil. Try replacing your Sear and Hammer to solve the problem.
Multiple balls are coming out of the barrel when the marker is fired
Your ball detent needs to be cleaned or replaced. Take off your ball detent and make sure the ball bearing is still inside. If the ball bearing is not present, replace the ball detent with a new one. If the ball bearing is present, clean it thoroughly and screw back in, BE SURE NOT TO OVERTIGHTEN.
Excessive Ball Breakage
Bad Ball Detent
The ball bearing inside of the Ball Detent may be missing, causing multiple balls to feed into the chamber and break upon firing. Remove the ball detent and check to see if the ball bearing is present. If it is not, replace the ball detent. If the ball bearing is there, clean it using a dry cloth and place it back into marker. BE SURE NOT TO OVERTIGHTEN.
Not using Electronic Loader
If you are shooting this electronic marker without the use of an electronic loader you may be out shooting your basic gravity-fed loader. Try using an electric loader such as the Empire Reload or Diablo TSA hopper.